Neo N3 Migration Guideline on Migration Page
This tutorial will guide you through the process of migrating Neo and GAS tokens from Neo legacy to Neo N3 on the Migration website using N3 compatible wallets.
Migration with NeoLine Wallet#
Click the icon in the upper right corner and click
Create wallet.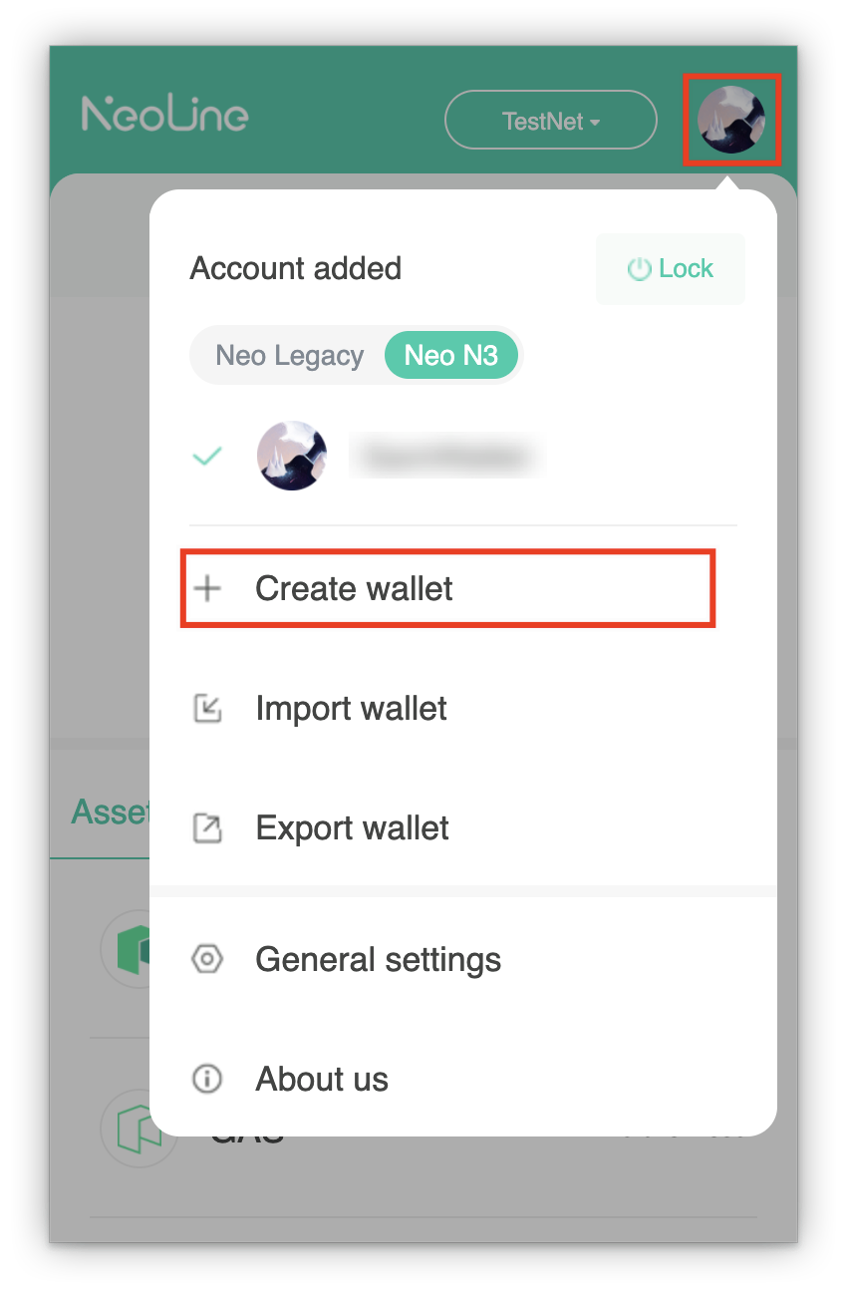
Select
Neo N3to create a Neo N3 wallet.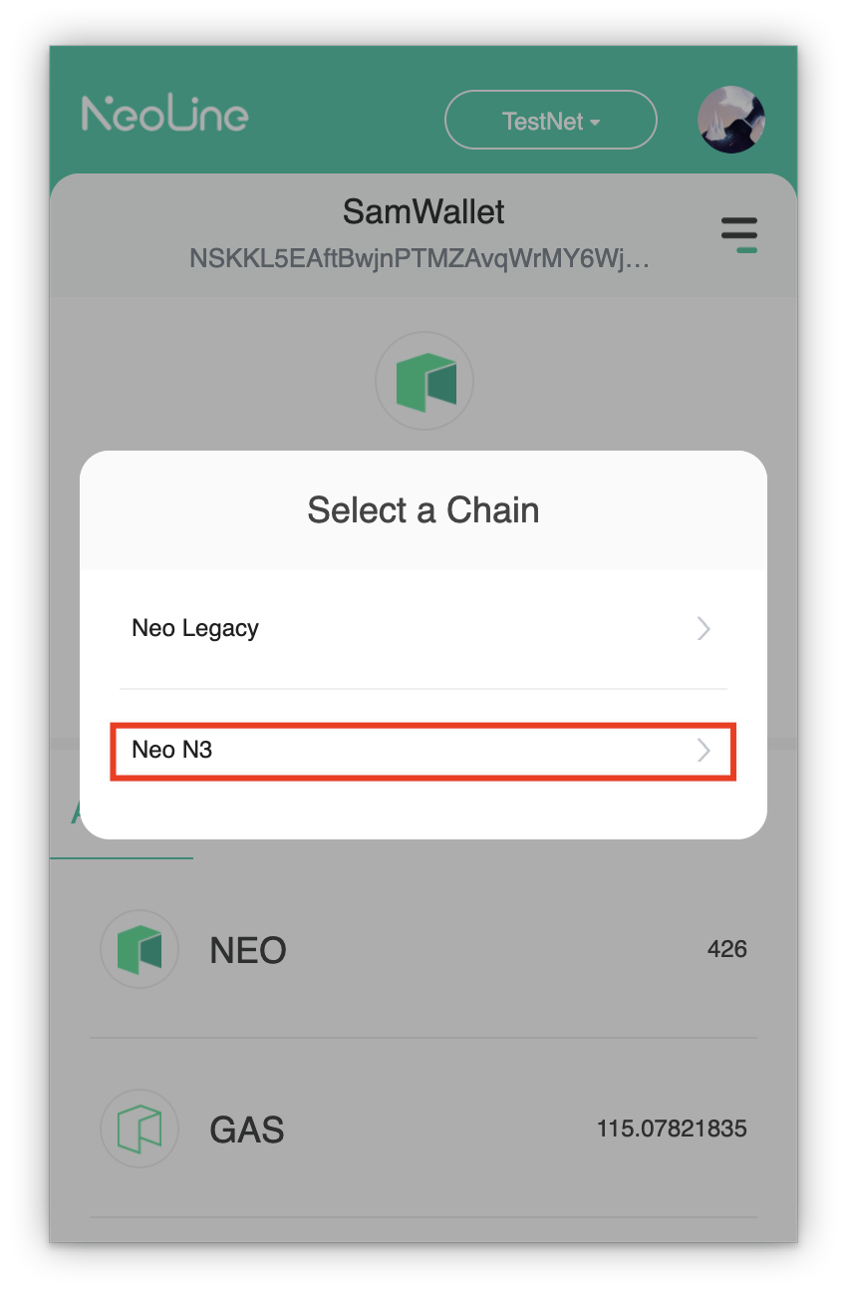
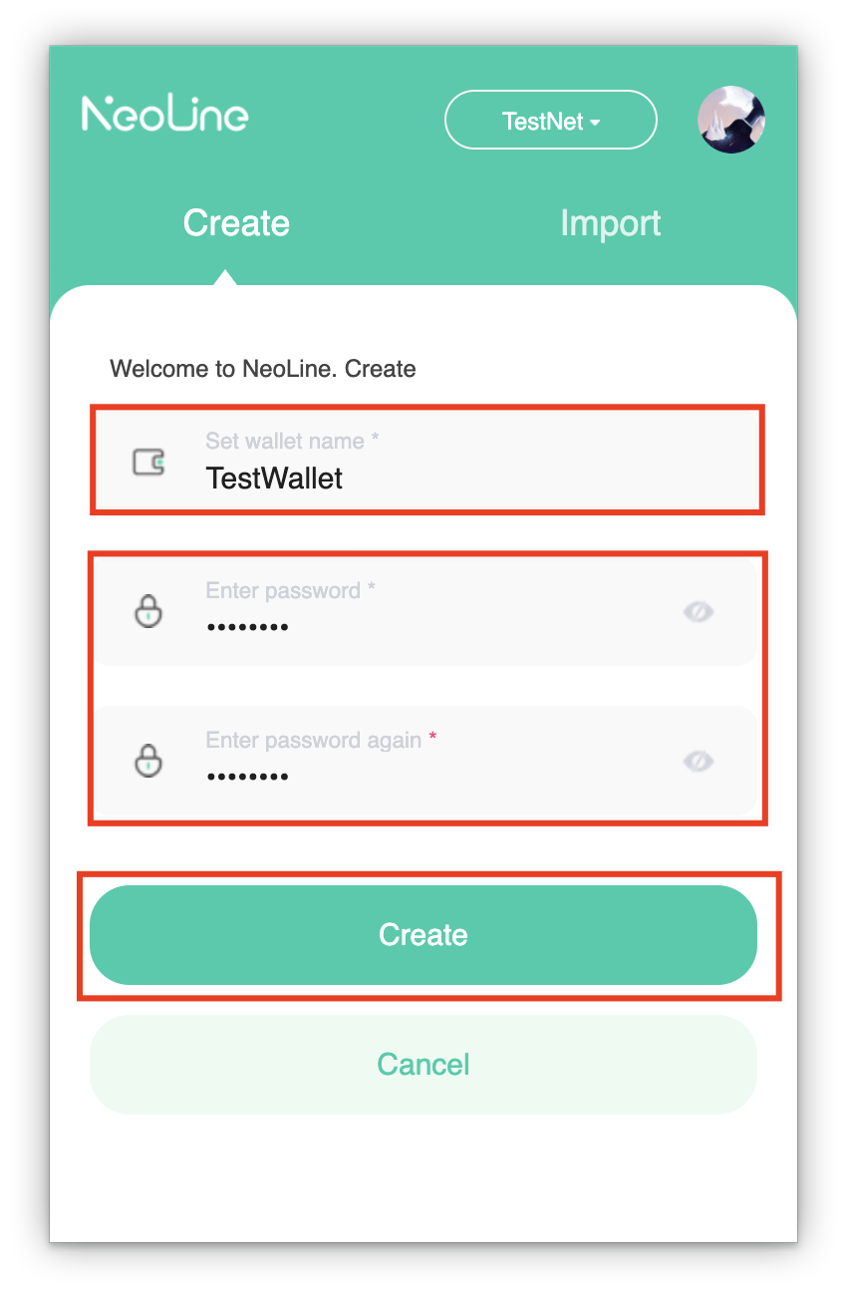
Input your wallet name and password and click
Create. A new Neo N3 wallet is successfully created.[!Note]
Please follow the prompt to back up your private key carefully.
Go to the Migration To N3 website. Click
CONNECT WALLET.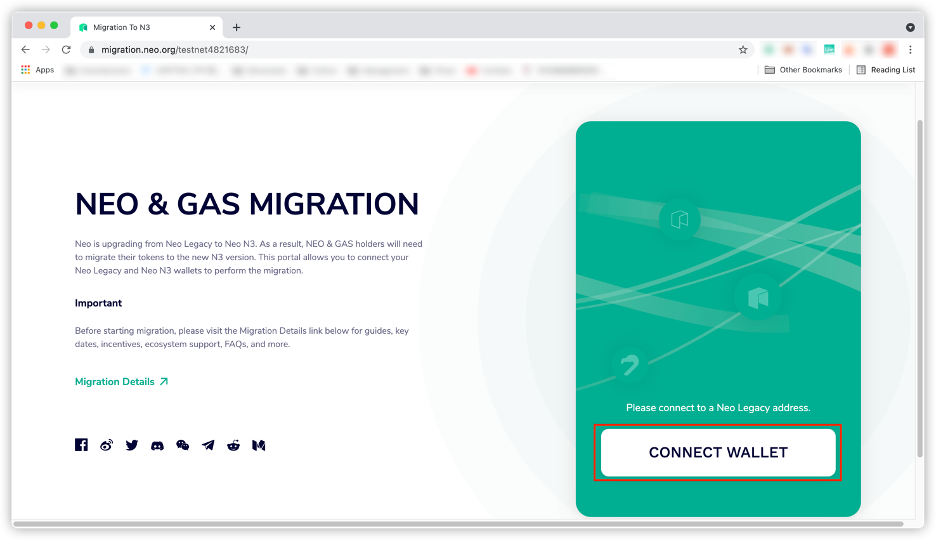
Click
Connect NeoLineto connect a NeoLine wallet.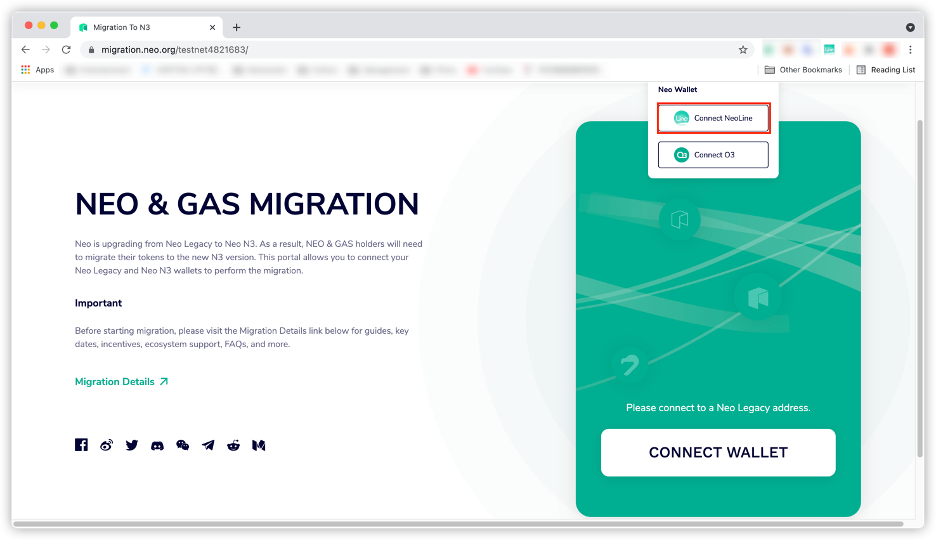
Click
Connect.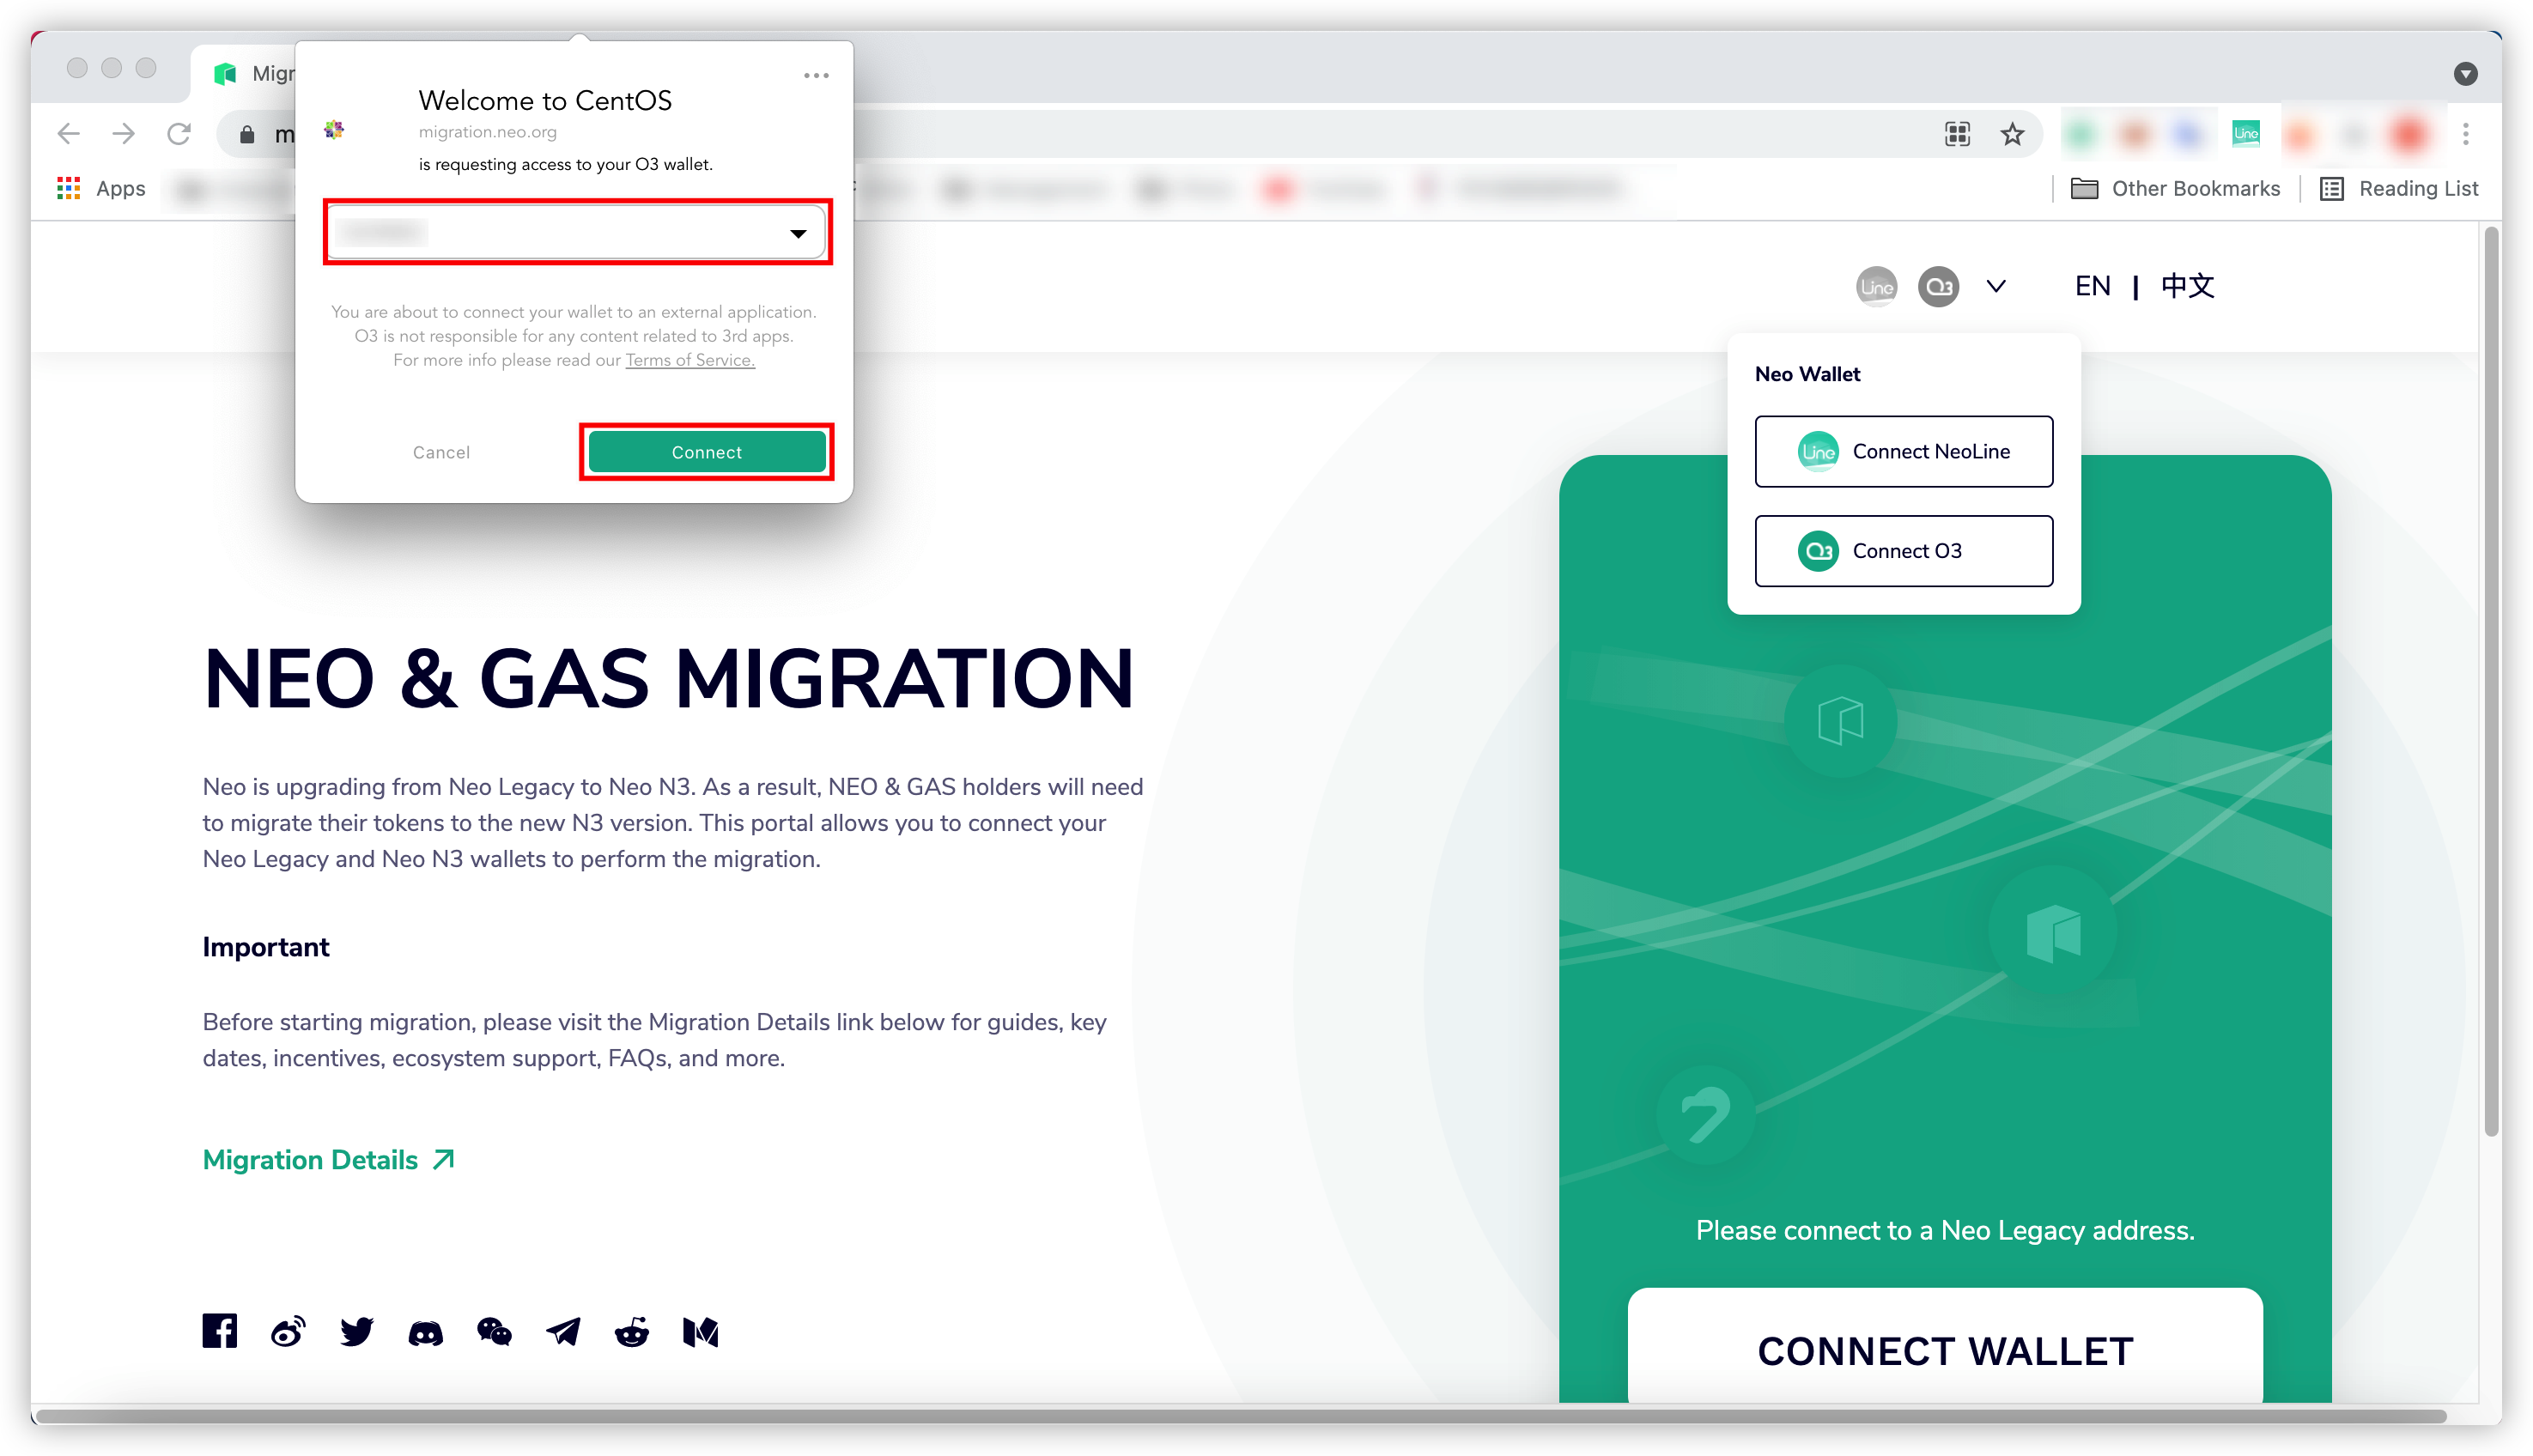
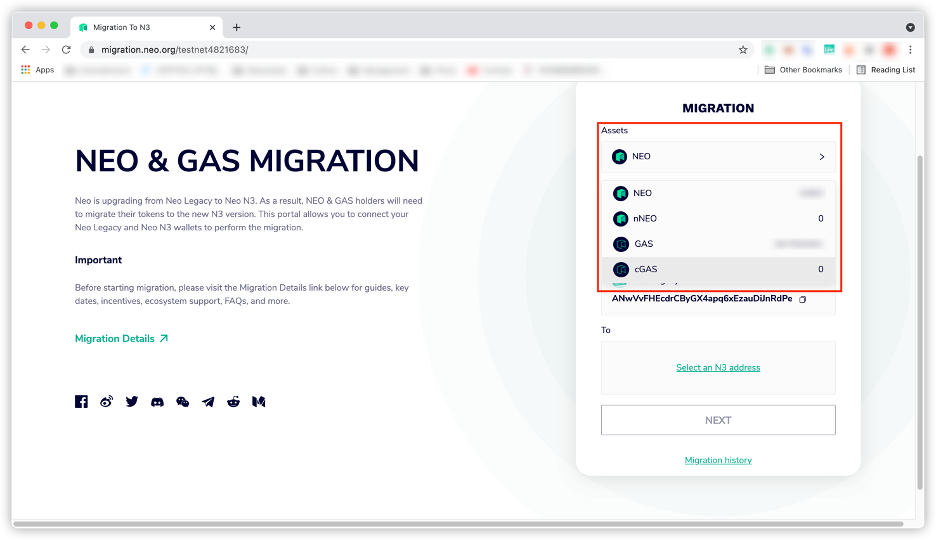
Select an asset you want to migrate.
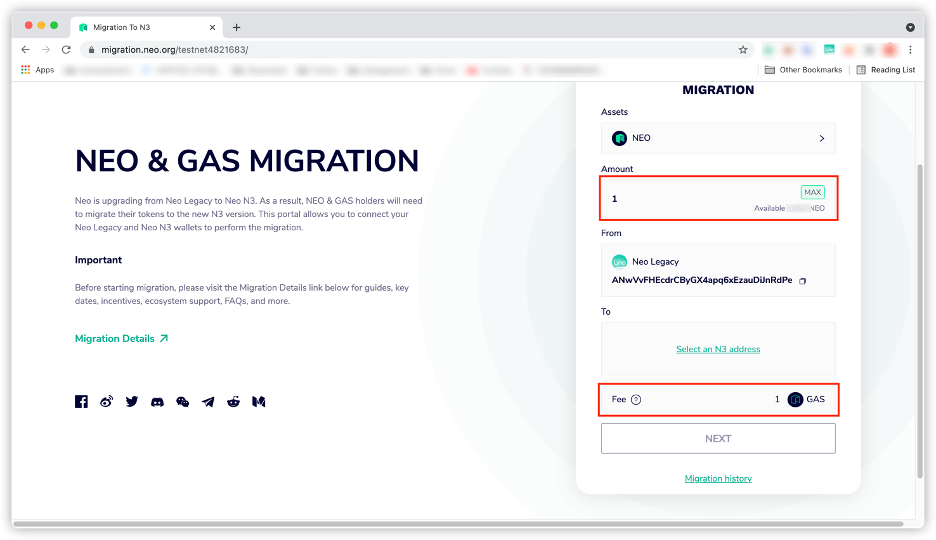
Input the amount you want to migrate.
[!Note]
A 1 GAS fee is required if you are migrating less than 10 NEO or 20 GAS. This is because fees are now required on all Neo N3 transactions. Allowing users to migrate small quantities of tokens with no fee opens up an exploit where users could potentially spam transactions to burn Neo Foundation GAS inefficiently.
Click
Select an N3 addressto select an N3 wallet address that you want to migrate to and then clickDone.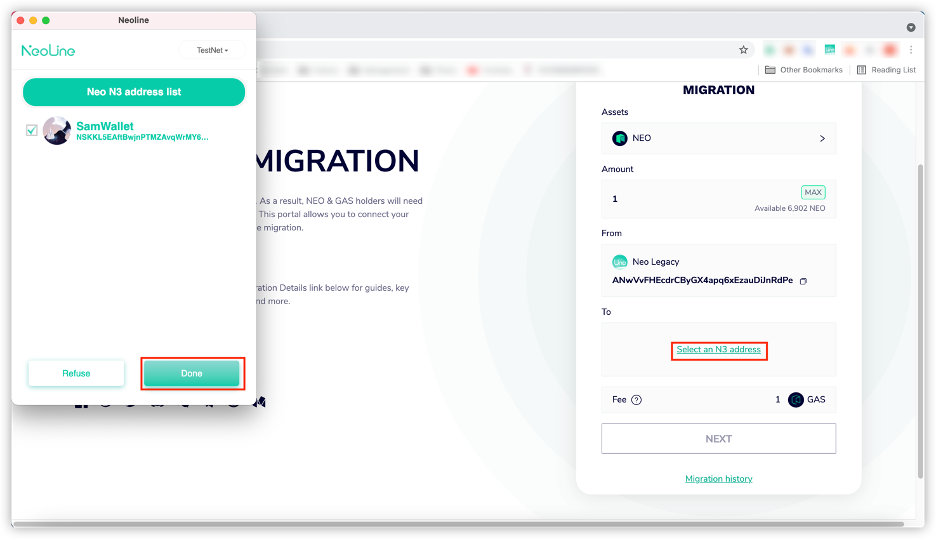
Click
NEXTto start the migration.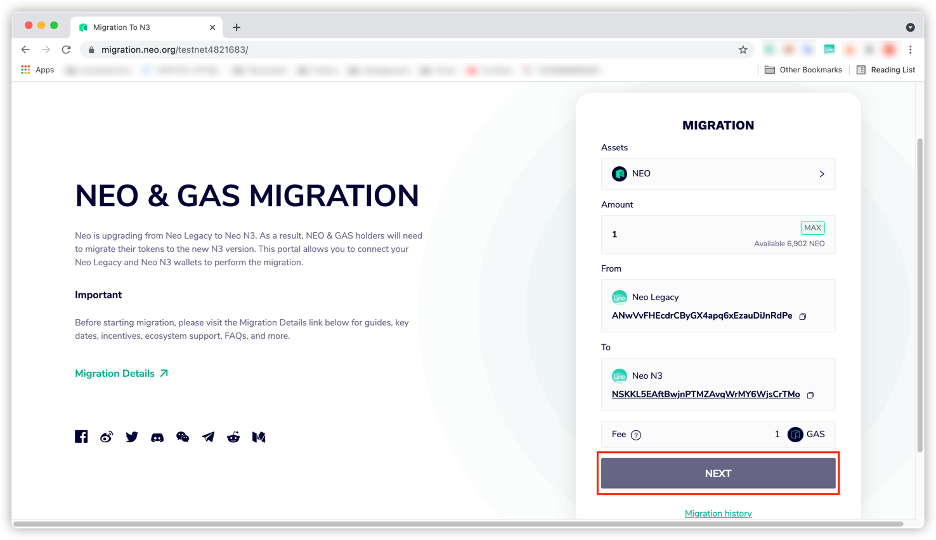
Confirm the migration information. If the information is correct, click
NEXT. Otherwise, click theBACKbutton to revise the information.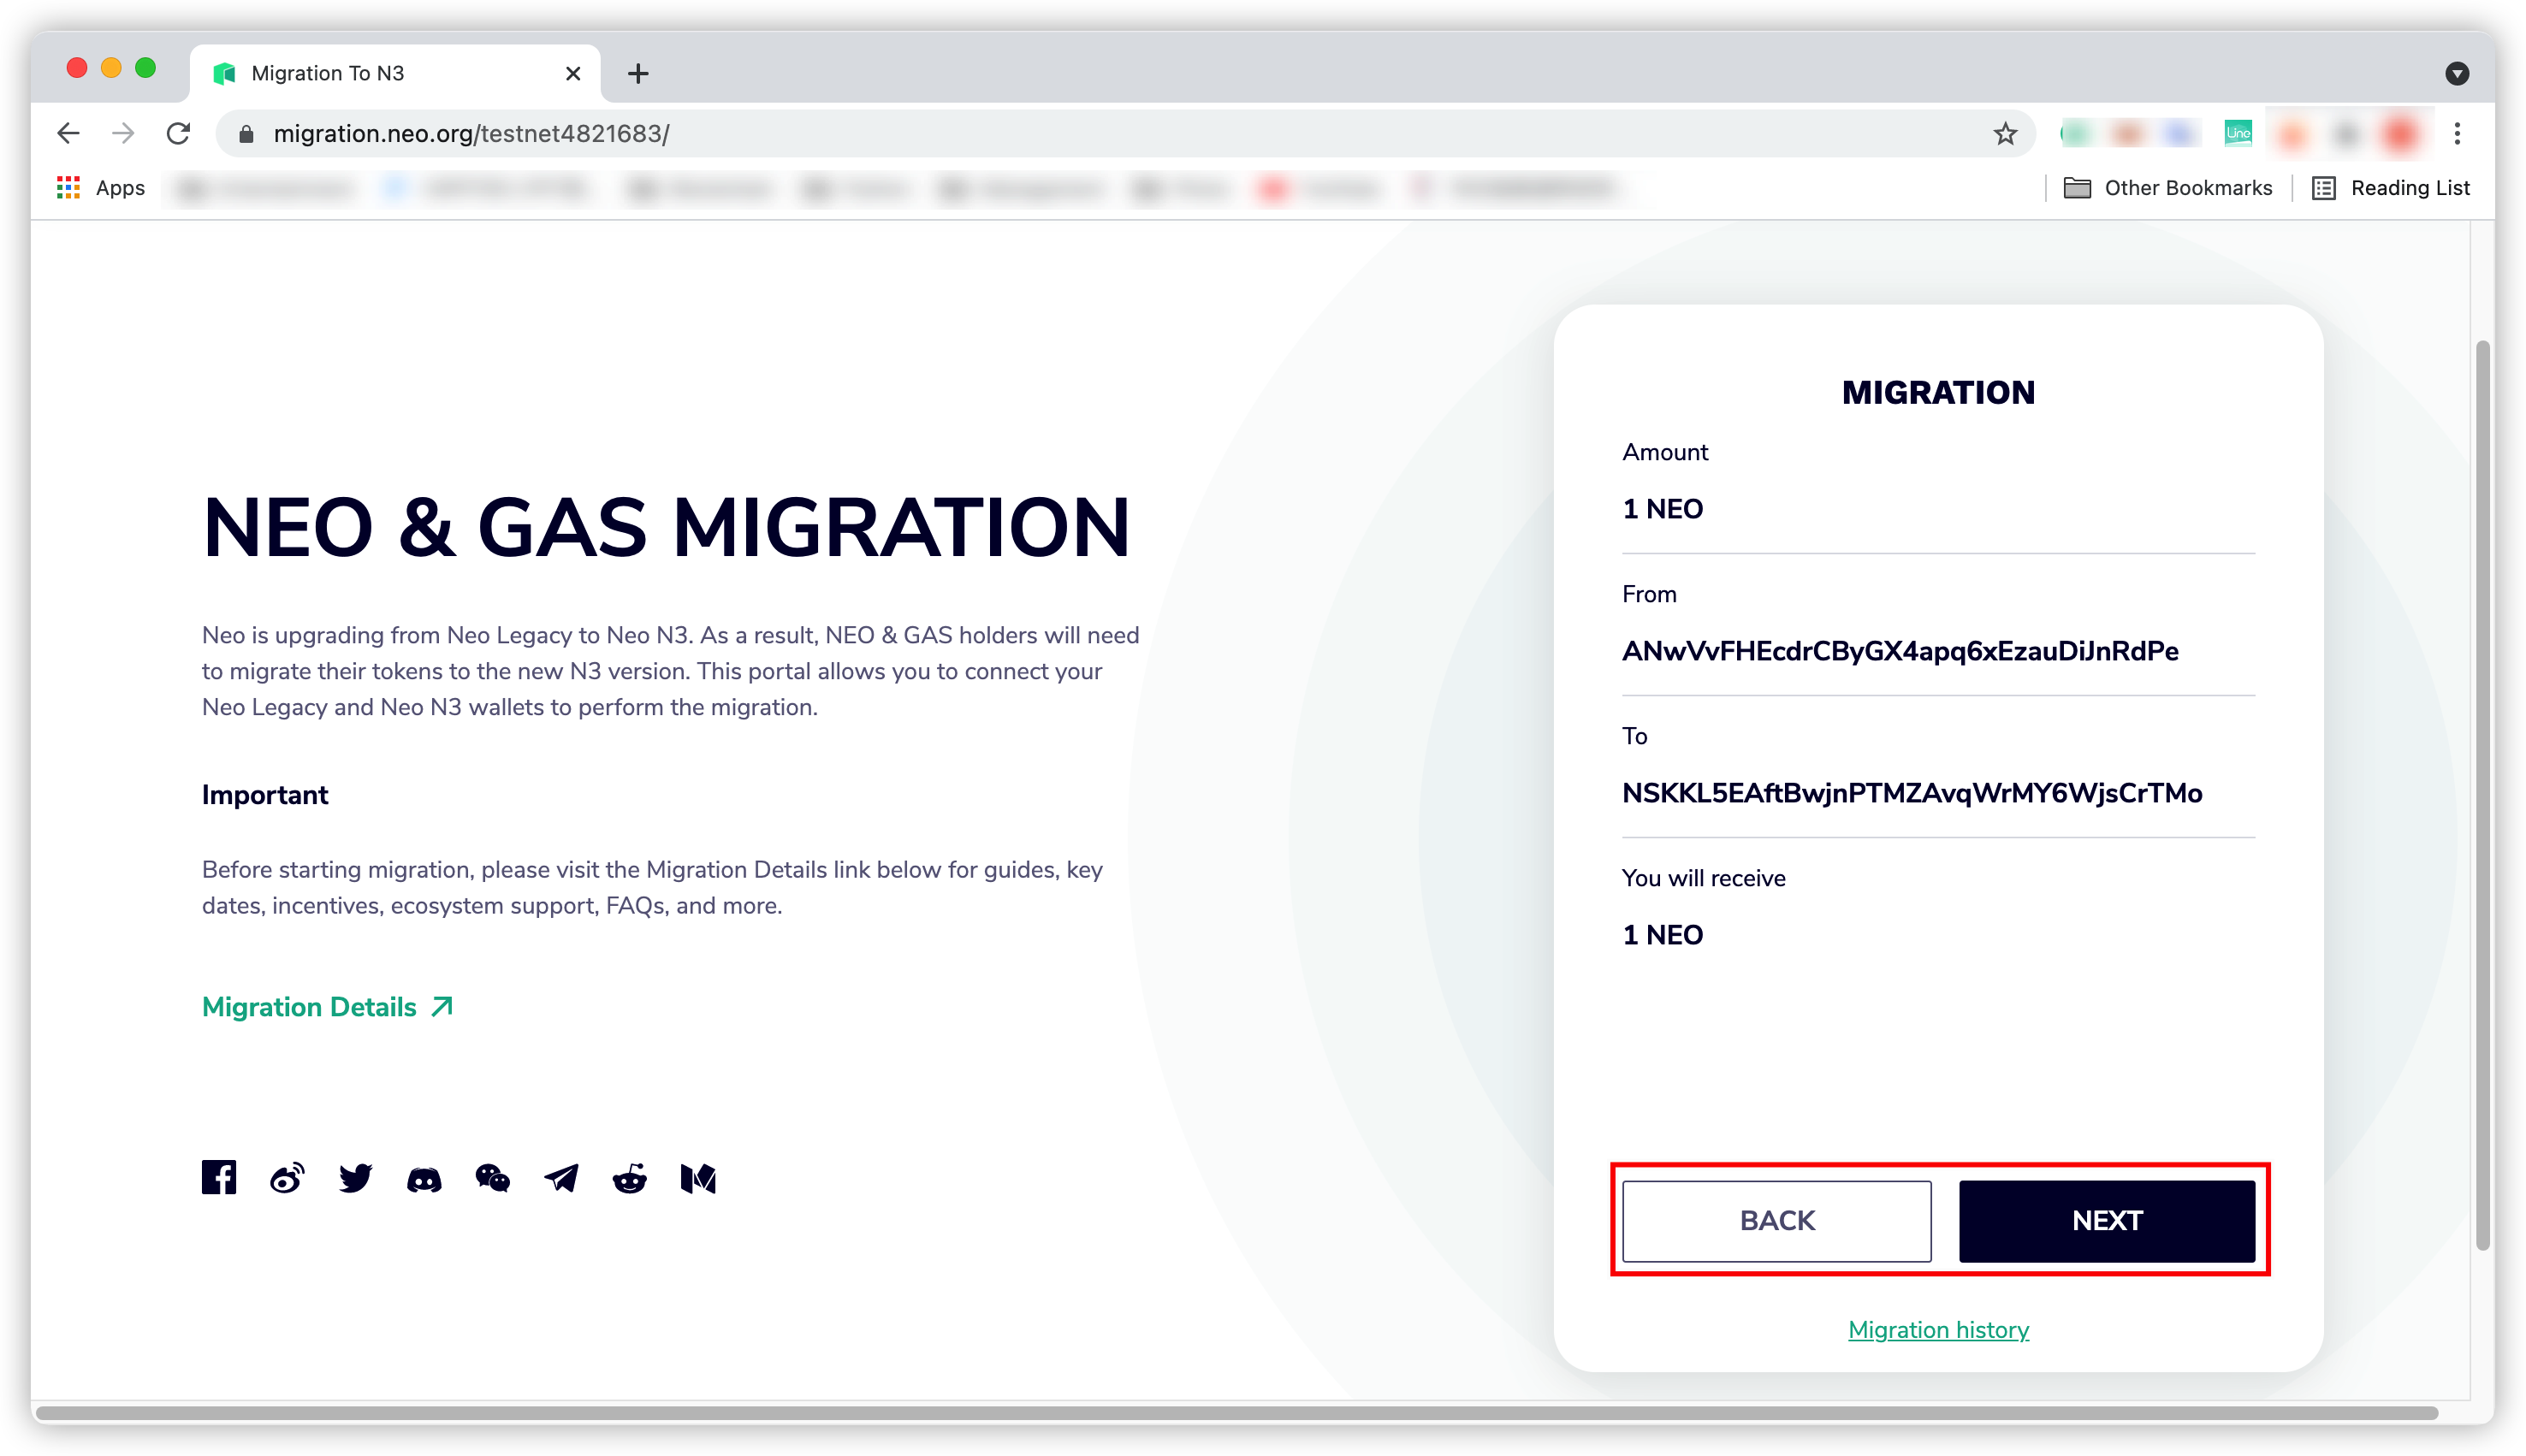
Click
Yesto approve the migration.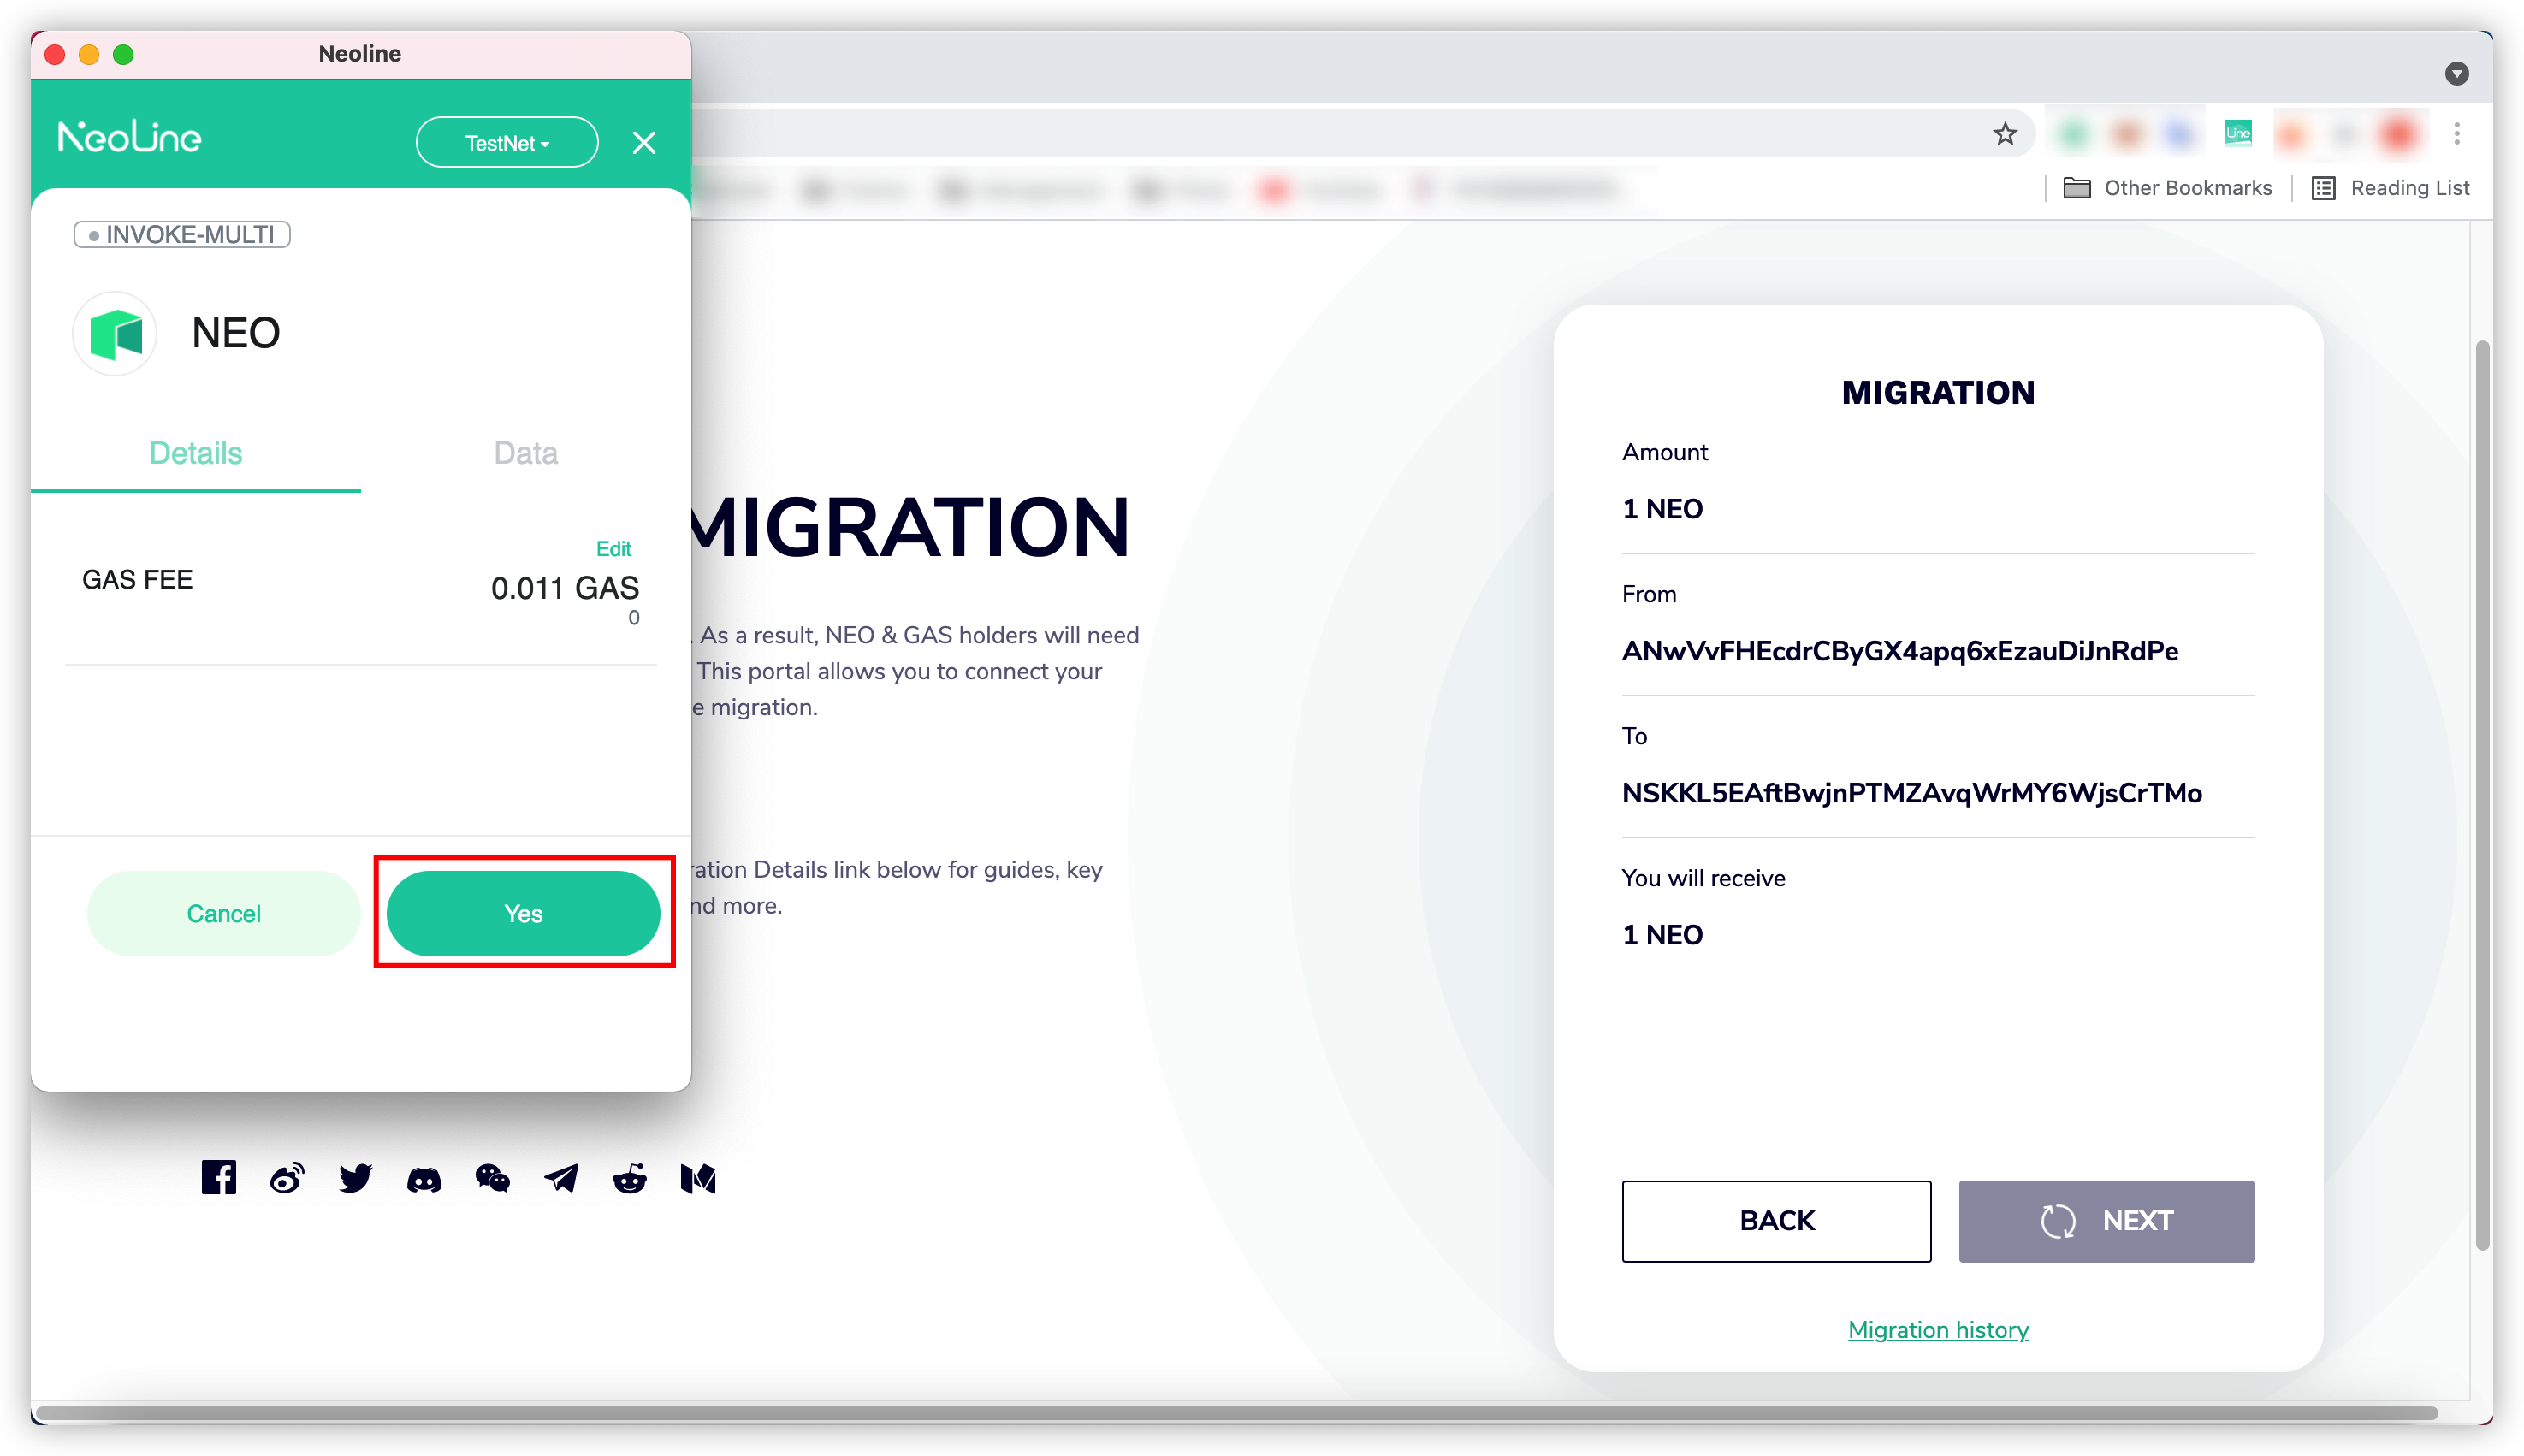
Wait for the migration process to complete. You can click
Migration historyto check the migration status.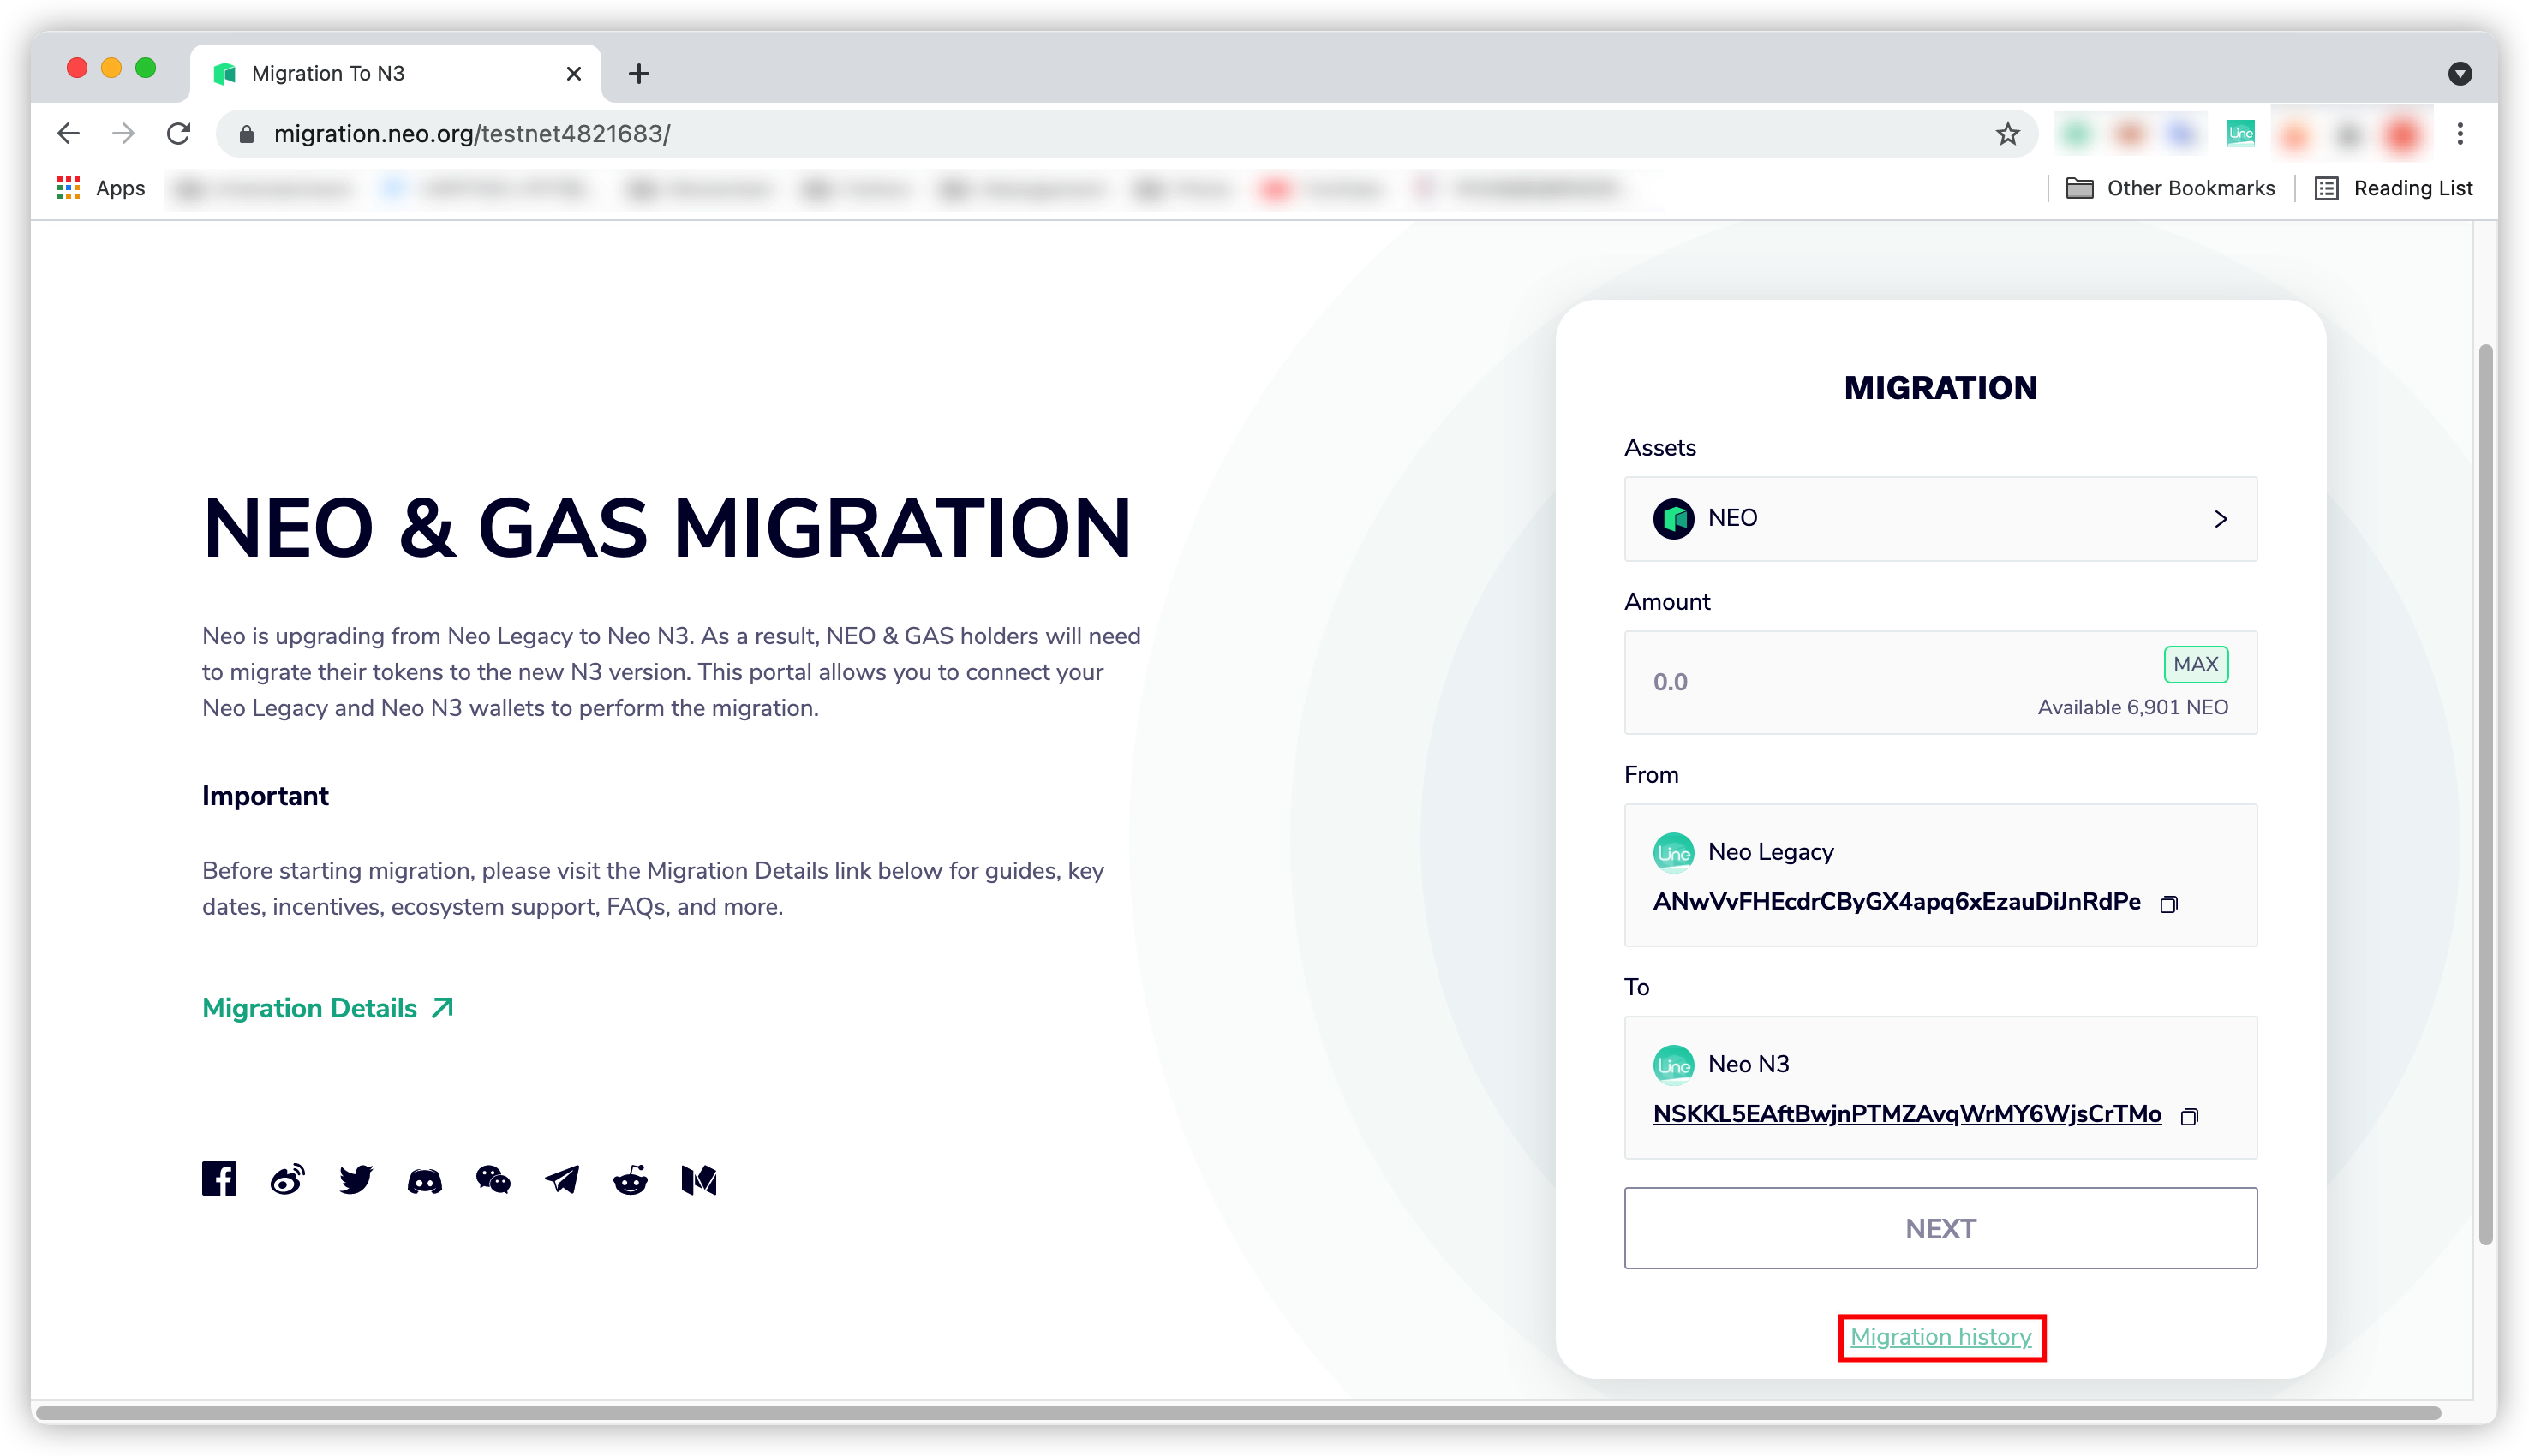

Migration with O3 Wallet#
Open the O3 wallet app. Click the wallet account and click
Create.Select
NEO N3and clickNextto create a Neo N3 wallet.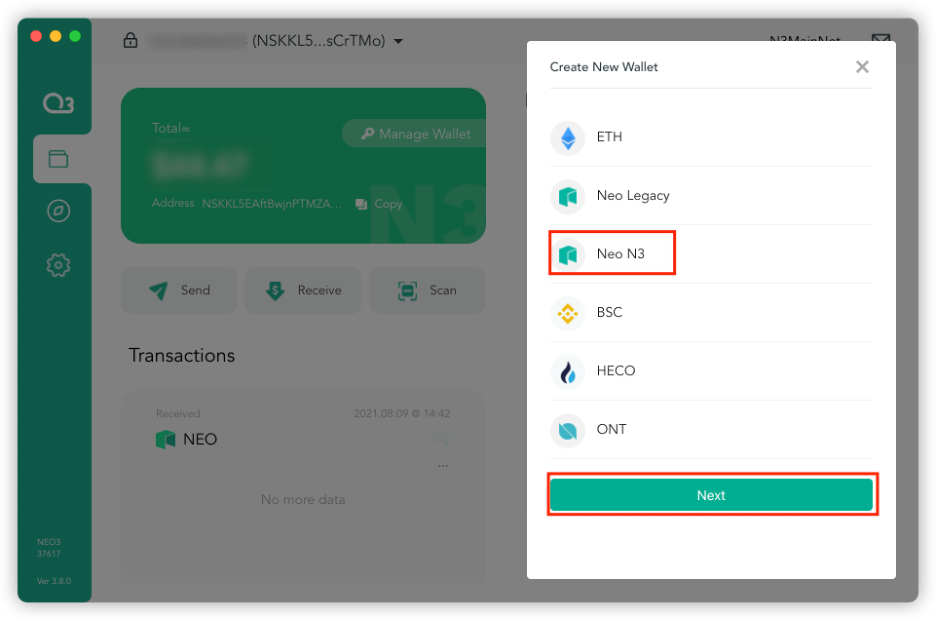
Input your wallet name and password and click
Create. A new Neo N3 wallet is successfully created.Go to the Migrate To N3 website. Click
CONNECT WALLETto connect a wallet.
Click
Connect O3to connect an O3 wallet.Select an account and click
Connect.
Select an asset you want to migrate.

Input the amount you want to migrate.
[!Note]
A 1 GAS fee is required if you are migrating less than 10 NEO or 20 GAS. This is because fees are now required on all Neo N3 transactions. Allowing users to migrate small quantities of tokens with no fee opens up an exploit where users could potentially spam transactions to burn Neo Foundation GAS inefficiently.

Click
Select an N3 addressto select an address that you want to migrate to, and then clickSelect.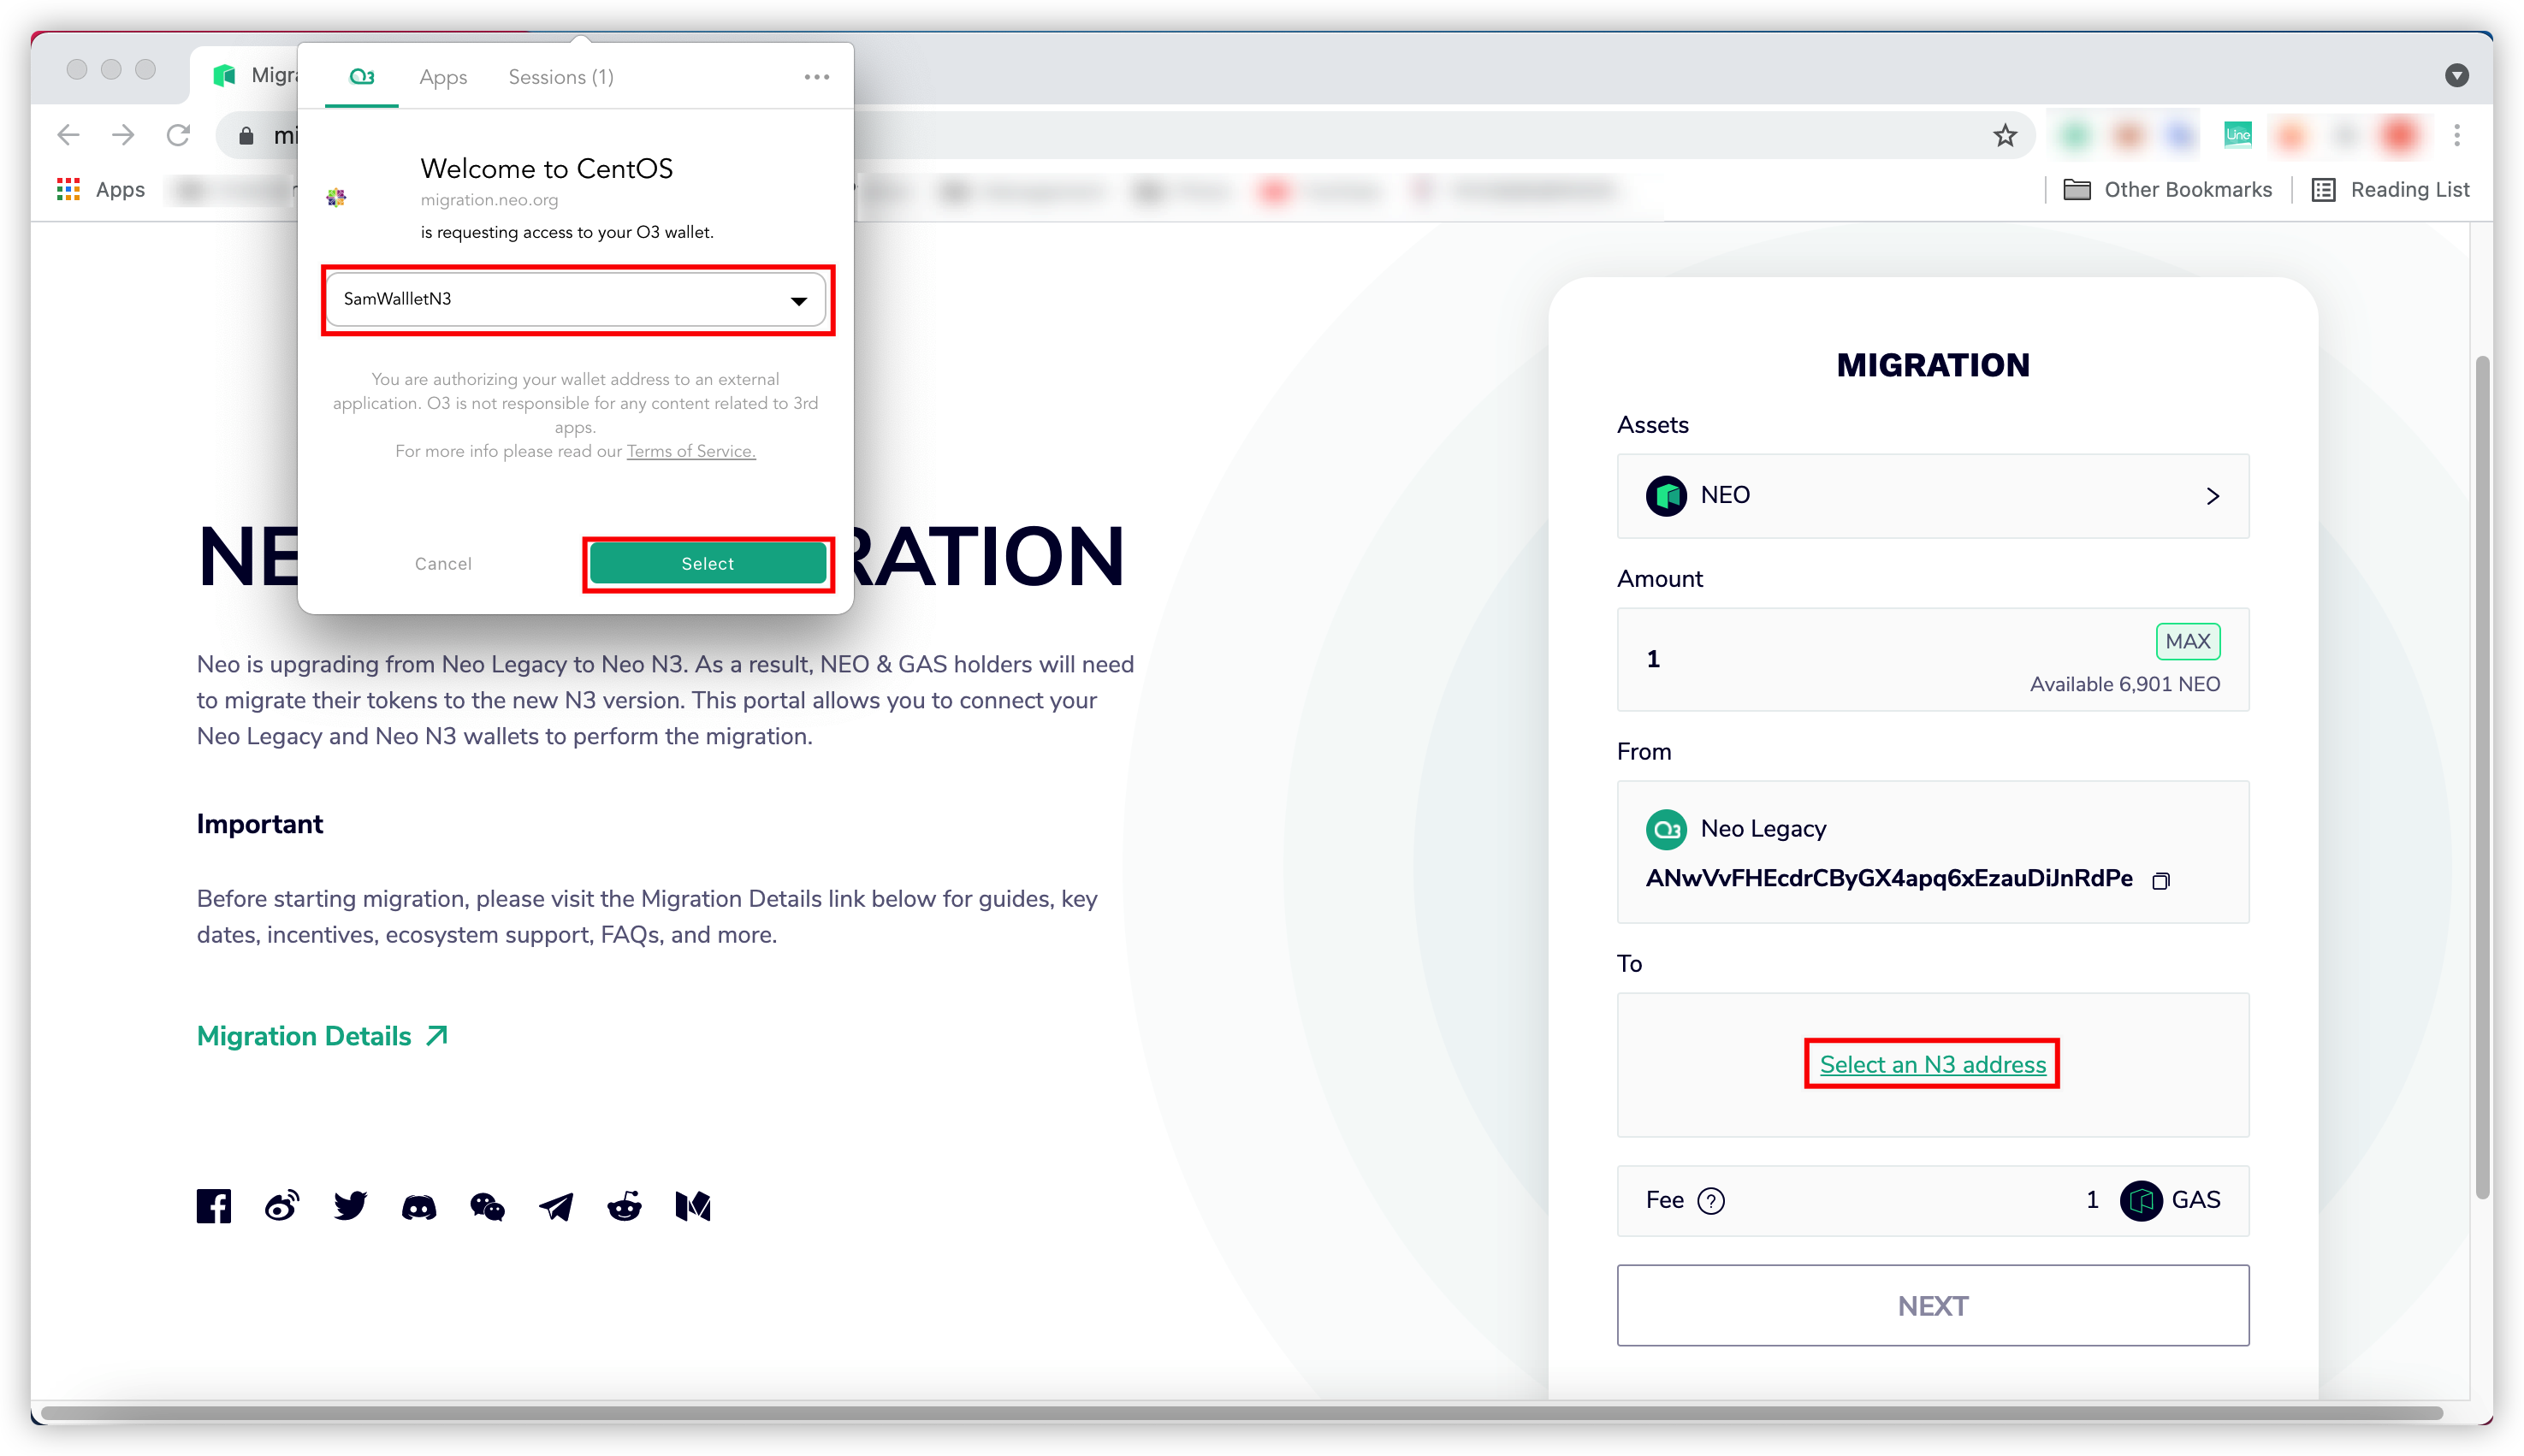
Click
NEXTto start the migration.
Confirm the migration information. If the information is correct, click
NEXT. Otherwise, clickBACKto revise the information.
Click
Approve.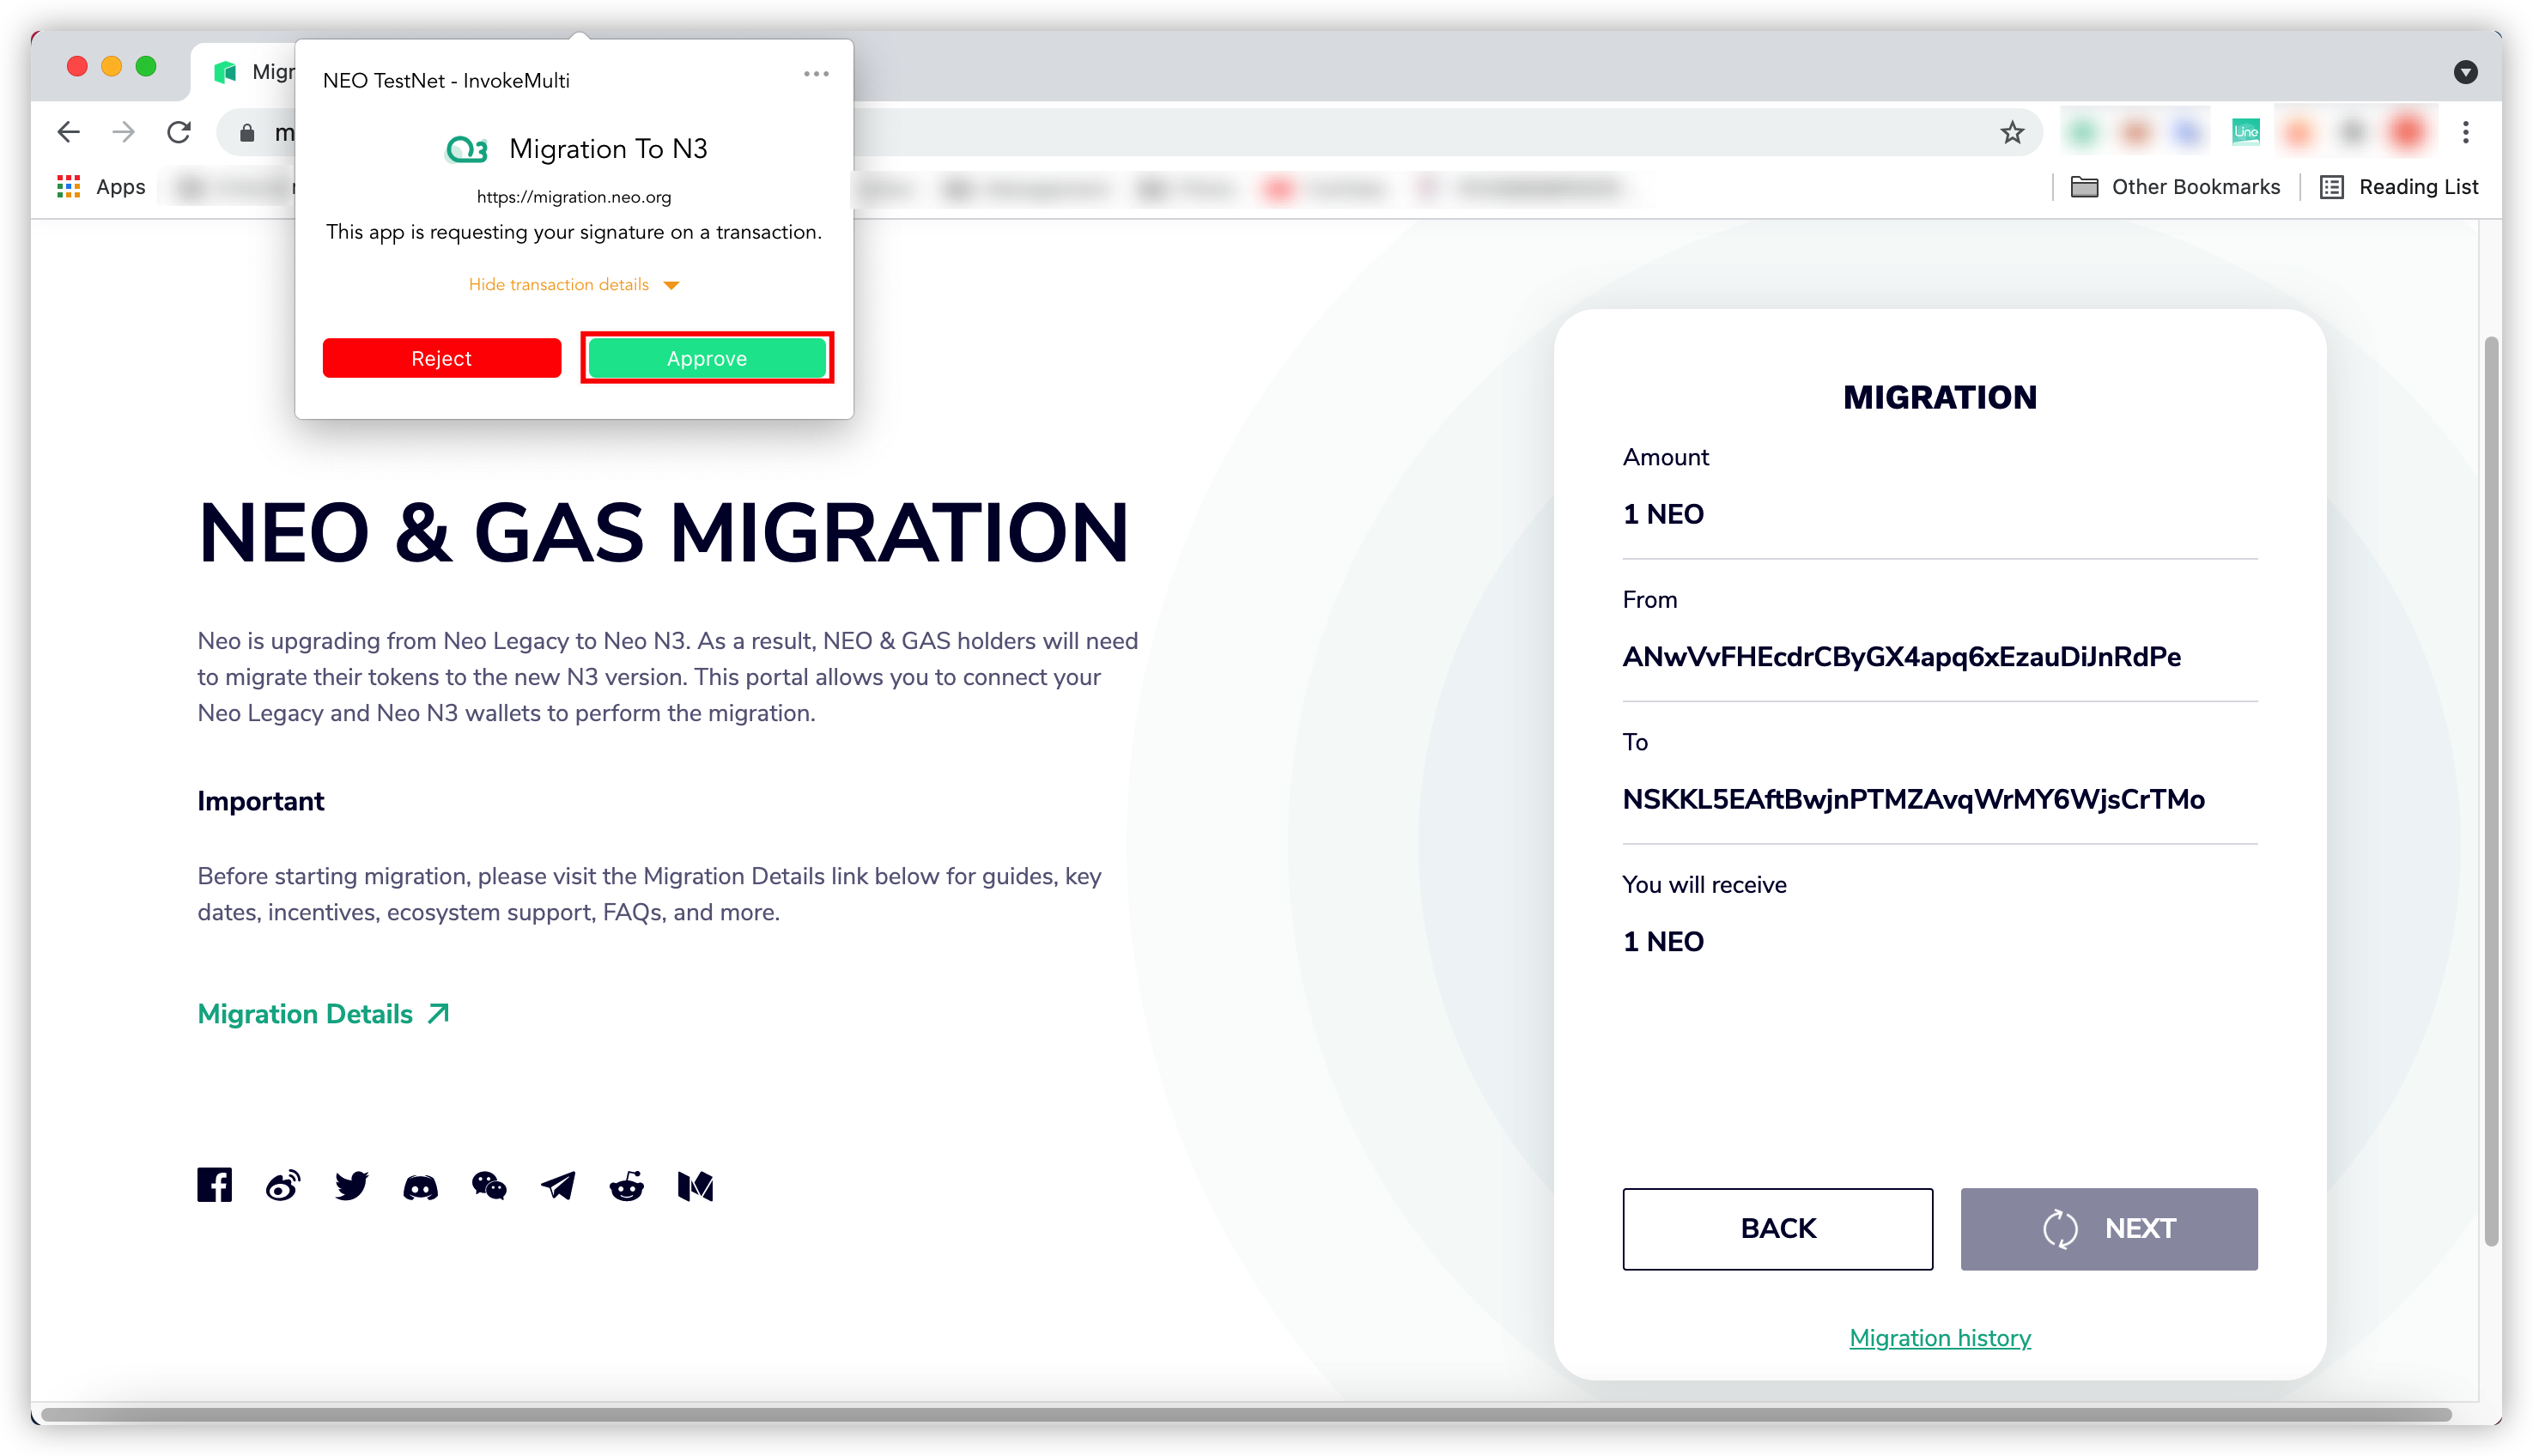
Wait for the migration process to complete. You can click
Migration historyto check the migration status.
